Saturday, September 27, 2014

Alcatel-Lucent Cellpipe 7130 Residential Gateway WAN Configration


  1. Open web browser and enter the ip address of Cellpipe 7130 Residential Gateway in address bar 192.168.1.1 and press enter key 
  2. You should see a dialog box pop up asking your for your  Cellpipe-7130 username and password
  3. Enter the user name "admin"and password "admin" and press enter key for login if authentication failed then try the user name "admin"and password "user"
  4. Click on Network and then click on WAN PTM Connections


  1. Enter the Interface name
  2. In mode option select PPPOE
  3. Select Port Based option
  4. Click on Add button


  1. Select Always use ID
  2. Enter the ID (Its VLAN ID provided by service provider)
  3. Enter the User name
  4. Enter the Password
  5. Select Always on option
  6. Select CHAP+PAP
  7. Select MTU Auto
  8. Click on Next button 


  1. Click on Save button
 Now WAN configuration has been completed

Saturday, July 12, 2014

Tplink TL-WR740N Access Point Quick-setup

Connect the Internet cable with Tplink TL-WR740N Access Point via WAN port. Connect the PC with Tplink TL-WR740N Access Point via LAN then follow the below steps

In Web browser enter the AP IP address 192.168.0.1 and press enter key from the keyboard. Enter the username and password admin and press enter key to login

  1. Click on Quick Setup 
  2. Click on next button


  1. In WAN connection type select Dynamic IP
  2. Click on Next button

Tuesday, July 8, 2014

ZXDSL-831CII Configration By Quick Start


In web brower address bar type the modem IP address 192.168.1.1 and press enter key then type the username and password admin then press enter to login
  1. Click on Quick Start button
  2. Click on the next button


  1. In ISP connection type select PPPOE/PPPOA 
  2. Click on Next button

Monday, June 23, 2014

Zyxel P-660R Series Modem Configration


Open web browser and enter modem IP address 192.168.1.1 in web browser and enter username "admin" and password "admin" for login.

  1. After login click on "+Quick Start"  
  2. Click on "Quick Start"
  3. Click on "Run Wizard" button


After clicking on Run Wizard button and new window appears

  1. Click on Next button

Tuesday, June 3, 2014

EchoLife HG520c Modem Wireless LAN Settings


  1. Open web browser and in address bar enter the IP address 192.168.1.1 and press enter button then enter the username and password "admin" and click on login buttonthen click on "+ Basic "  
  2. Click on "Wireless Lan" Option
  3. In access point option select "Enable"
  4. Select the country "Pakistan"
  5. Enter the SSID (any name)

Monday, June 2, 2014

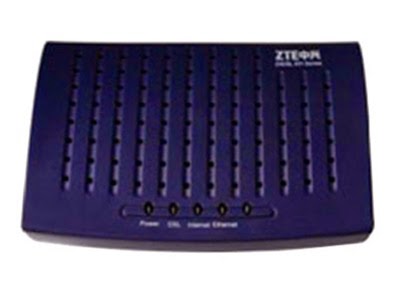
ZTE ZXDSL 831 Series modem WAN configration

\

  1. Open web browser and in address bar enter the modem IP address "192.168.1.1" and press Enter key from the keyboard.
  2. Enter the username and password "admin" and press ok button


  1. Click on "Quick Start" option
  2. Click on "Quick Setup"
  3. Enter the VPI (Provided the ISP)
  4. Enter the VCI (Provided the ISP)
  5. Click on Next button

Saturday, May 31, 2014

Huawei EchoLife HG510a, HG520c Modem WAN Configration


  1. Open web browser and in address bar enter the IP address 192.168.1.1 and press enter button
  2. Enter the username and password "admin" and click on login button
  3. Click on "+ Basic " and then click on "WAN setting"


In WAN settings follow the steps given below

  1. Enter VPI  (Provided by ISP)
  2. Enter  VCI (Provided by ISP)
  3. In Active option select "yes"
  4. In mode option select "Routing"
  5. In encapsulation option select "PPPOE"
  6. In multiplex option select "LLC"
  7. Enter the AAA username (Provided by ISP)
  8. Enter the AAA password (Provided by ISP)

Saturday, May 17, 2014

Aztech DSL605EW PPPOE Configration

In web browser type 192.168.1.1 and press enter button
Enter user name and password "admin"
Click on "login" button.


Click on "WAN"
Select "New connection" from the menu


Enter Connection Name
In connection type select "PPPOE" from drop down menu
Select "NAT" and "firewall"
In encapsulation select "LLC" option
Enter Username and password provided by ISP
Enter VPI and VCI provided by ISP
Select Authentication  "auto" mode
Click on "Apply"

Wednesday, May 14, 2014

Aztech DSL605EW Firmware Upgrade

After Login follow the following steps.

Click on "Firmware Upgrade"
Click on "get Configuration" to get modem configuration backup,
To get Aztech DSL605EW firmware upgrade click here.
Click on browser button and select firmware file,
Click on "Update gateway" button.
After upgrading firmware restore the backup settings.

Saturday, April 26, 2014

Linksys ADSL homegateway configration


  1. Open web browser and in address bar enter the modem IP address " 192.168.1.1 " and press enter button. Enter the username " admin" and password "admin" and then click on login.
  2. Enter the VPI , VCI and Username and Password which are provided by your ISP.
  3. select keep alive if you want to alive your internet all the time.
  4. Select DHCP enable.
  5. Select time zone.


Click on "Save" button then your modem will save settings and then it will rebooted.


For wireless  settings follow the following steps.
  1. Click on wireless tab then select " Basic wireless settings" option
  2. Select the wireless network mode "Mixed"
  3. By default SSID is linksys so you can Change the the SSID 
  4. Select the any wireless channel. 
  5. Enable the wireless SSID Broadcast
  6. Click on "Save settings" button.

By default the wireless is open so if you want to secure the wireless then follow the steps given below
  1. Select "Wireless Security" option
  2. Select the "Security mode" . I recommend "WPA2-personal" because it is highly secure then the other security modes.
  3. In passphrase type the wireless security key. (Minimum 8 characters)
  4. Click on "Save settings" button for apply changes


Friday, April 18, 2014

PTCL IPTV Set-up box Advanced settings

Press "Set" button from remote and login screen will appears.  Enter the password 8288 and select "Enter" button.


You will get the STB configuration menu. Select the "Browser Configuration" option and press "Ok" button from remote.


The browser setup screen will appears.

Home Page :
 It is the first Web page displayed when the STB is turned on. Usually, it is the EPG page.  
 http://203.99.161.14:8082/EDS/jsp/index.jsp

Entry: 
we can select BTV or EPG. 

  If BTV is selected, the TV will display the last channel you watched  last time. 
  If EPG is selected, the TV will display the first page of EPG. 

Region:
Select a region, the warning language of STB will be changed to the language of the region you selected. 

After configration Enter the password 3008 and select the save button, then select "main menu" option.


In main manu select "TV Standard Configuration" option.
In  the  TV  standard  configuration,  we  can  select  TV  standard  and  set  video  display  region  and  other  parameters,
TV standard:
  We can select PAL or NTSC according to the EPG standards the ISP provided and your local TV standard. 
Top margin:
   The margin between the video display area and the top margin of the TV. 
Left margin:
  The margin between the video display area and the left side margin of the TV. 
Width:
    The width of the video display area. 
Height:

              The height of the video display area. 
After Configuration enter password 3008 and select save button. Select Main menu


In main menu select "Time Configuration"
In the time configuration, set the time information of STB
Cur time: The current time displayed
Time zone: 5 

Ntp time server: 203.99.161.89


In main menu select "Restore Parameters"
Enter the password 3008 and select "Action" button, then select the main menu button. Select Reboot option button to apply changes.


Sunday, April 13, 2014

PTCL IPTV setup box configration

NOTE : Before IPTV setup box configuration setup the modem setting. For modem configuration click here.


Power on the Setup-box and attach the Setup-box (STB) with TV with AVI cable and connect the DSL modem with Setup-box (STB) through the LAN cord.

Press the "Set" button from STB remote then a login screen will apear. Enter the password "8288" by pressing STB remote button and by arrow keys on remote select "Enter" then press ok button from STB remote.


After Login a menu will appear. Select the "Network configuration" option and then press "ok" button.


Select the PPPOE option then enter the username and password  provided by ISP. In 4th step enter  the password "3008" then select the save button and press "ok". Then select "Main Menu" option and press "ok". Then select "Reboot" option and press "ok" button from STB remote.


Now STB configuration is completed.

Friday, April 4, 2014

Configration of Speed Touch modem ST511E and ST580

Open web browser and in address bar write default gateway IP address 10.0.0.138  it will open following page


It will automatically prompt for setup wizard if it is not configured ,other wise you click on  "advanced" then click on  "easy setup" and click Next at welcome wizard.


 Choose Routed PPPOE always on option for PPPOE and click Next.


 In Routed PPPOE packet service window, give vpi.vci ,username and password provided by ISP and click on "Next" button

In local ip setting window, choose LAN ip of your router or go with default as you wish


Choose DHCP POOL of your desire at your LAN if you want and also check at Start DHCP to assign ip to your LAN by  DHCP. Click "Next" button


Click start, it will configure your speedtouch modem.


Tuesday, April 1, 2014

Configuration of Thomson Speedtouch Modem ST536, ST546, ST585 & ST580

Open web browser and in address bar write default gateway IP address 192.168.1.254  it will open following page


One left side menu click speed touch and then bellow will open pick a task, click at setup, a wizard will open ,Click Next.

Choose Router and click next


In Routed Internet Connection window, choose vpi/vci  according to your ISP, in connection type choose PPPOE and click Next


 In Internet account settings window, give username and password provided by ISP and also confirm password, click next.


In access control window, you can specify username and password to access the router ,default is Administrator and password is blank. Click on next button


On Start Configuration click at start, it will start to configure your speed touch and will give the finish window after configuring.


Wednesday, March 26, 2014

Creating PPPoE Dialer In Windows XP

Click on Start  OR Press "Windows Sign "  from Keyboard and click on Control panel. Click on "Network and Internet Connections"


Click on "Network Connections"


Click on "Create a new connection"


Click on "Next" button


Select "Connect to the Internet" option from the selection and then click on "Next" button


Select "Set up my Connection Manually" option from the selection and then click on "Next" button

Select "Connect using a broadband connection that requires a user name and password" option from the selection and then click on "Next" button


Type the "ISP name" then click on next


Enter the username and password and then click on "Next" button


Select "Add a shortcut to this connection to my desktop" option  and then click on "Finish" button


Double click on dialer shortcut on desktop and click on connect button.